
Developing a Concept Board
The starting point of any interior design project
As part of my Space Planning class final at Parsons, we have started by selecting 1 of 3 programs provided by our professor. I chose to go with a fashion designer who will be renovating a penthouse to use as a private Residential Complex and Showroom. This was definitely one of the more challenging programs due to the fact that the client requires the living complex be completely disconnected from the working showroom, to maintain privacy.
To kick off the project we are beginning with the Concept. A concept board can be defined as the starting point of the creative process for a new home or room design. Through interviews and observation, you get to know the client better and find out about their likes and dislikes as well as passions and interests. Each student is free to develop their own personal style of organizing this, but we have been asked to prepare a journal to showcase our thought process. I took the journal literally and decided to jot down al of my notes and collage images. I think this practice works well for me, and can see myself utilizing it throughout a true design project to keep all of my thoughts, important notes for each client, and inspirations in one place and organized.
I’d like to take you along with me on this project as it unfolds, hope you enjoy!
Client Design Brief
Before I was able to come up with the concept for my client I wanted to get to know my client. This is where you would typically have a consultation with your client, but being that initial program (brief) was created by our professor I had fun imagining little details that weren’t included. Everything from the type of music they listen to and the kind of car they would drive. I even went as far as to give my pretend client a name, Sophie.
A little about my client: Sophie is a fashion designer who loves entertaining, soul music, and learning about new cultures. Her core design values stay true to her values in life, in using ethically source sustainable materials. She prefers quality and substance over quantity and would rather have a few very special things, then collect many frivolous items. And possibly most importantly, she requires her penthouse to have a space she can use as a showroom for her clients + working space for full-time staff, that is completely separate from her private residential space where she retreats to relax as well as entertain friends during her downtime.
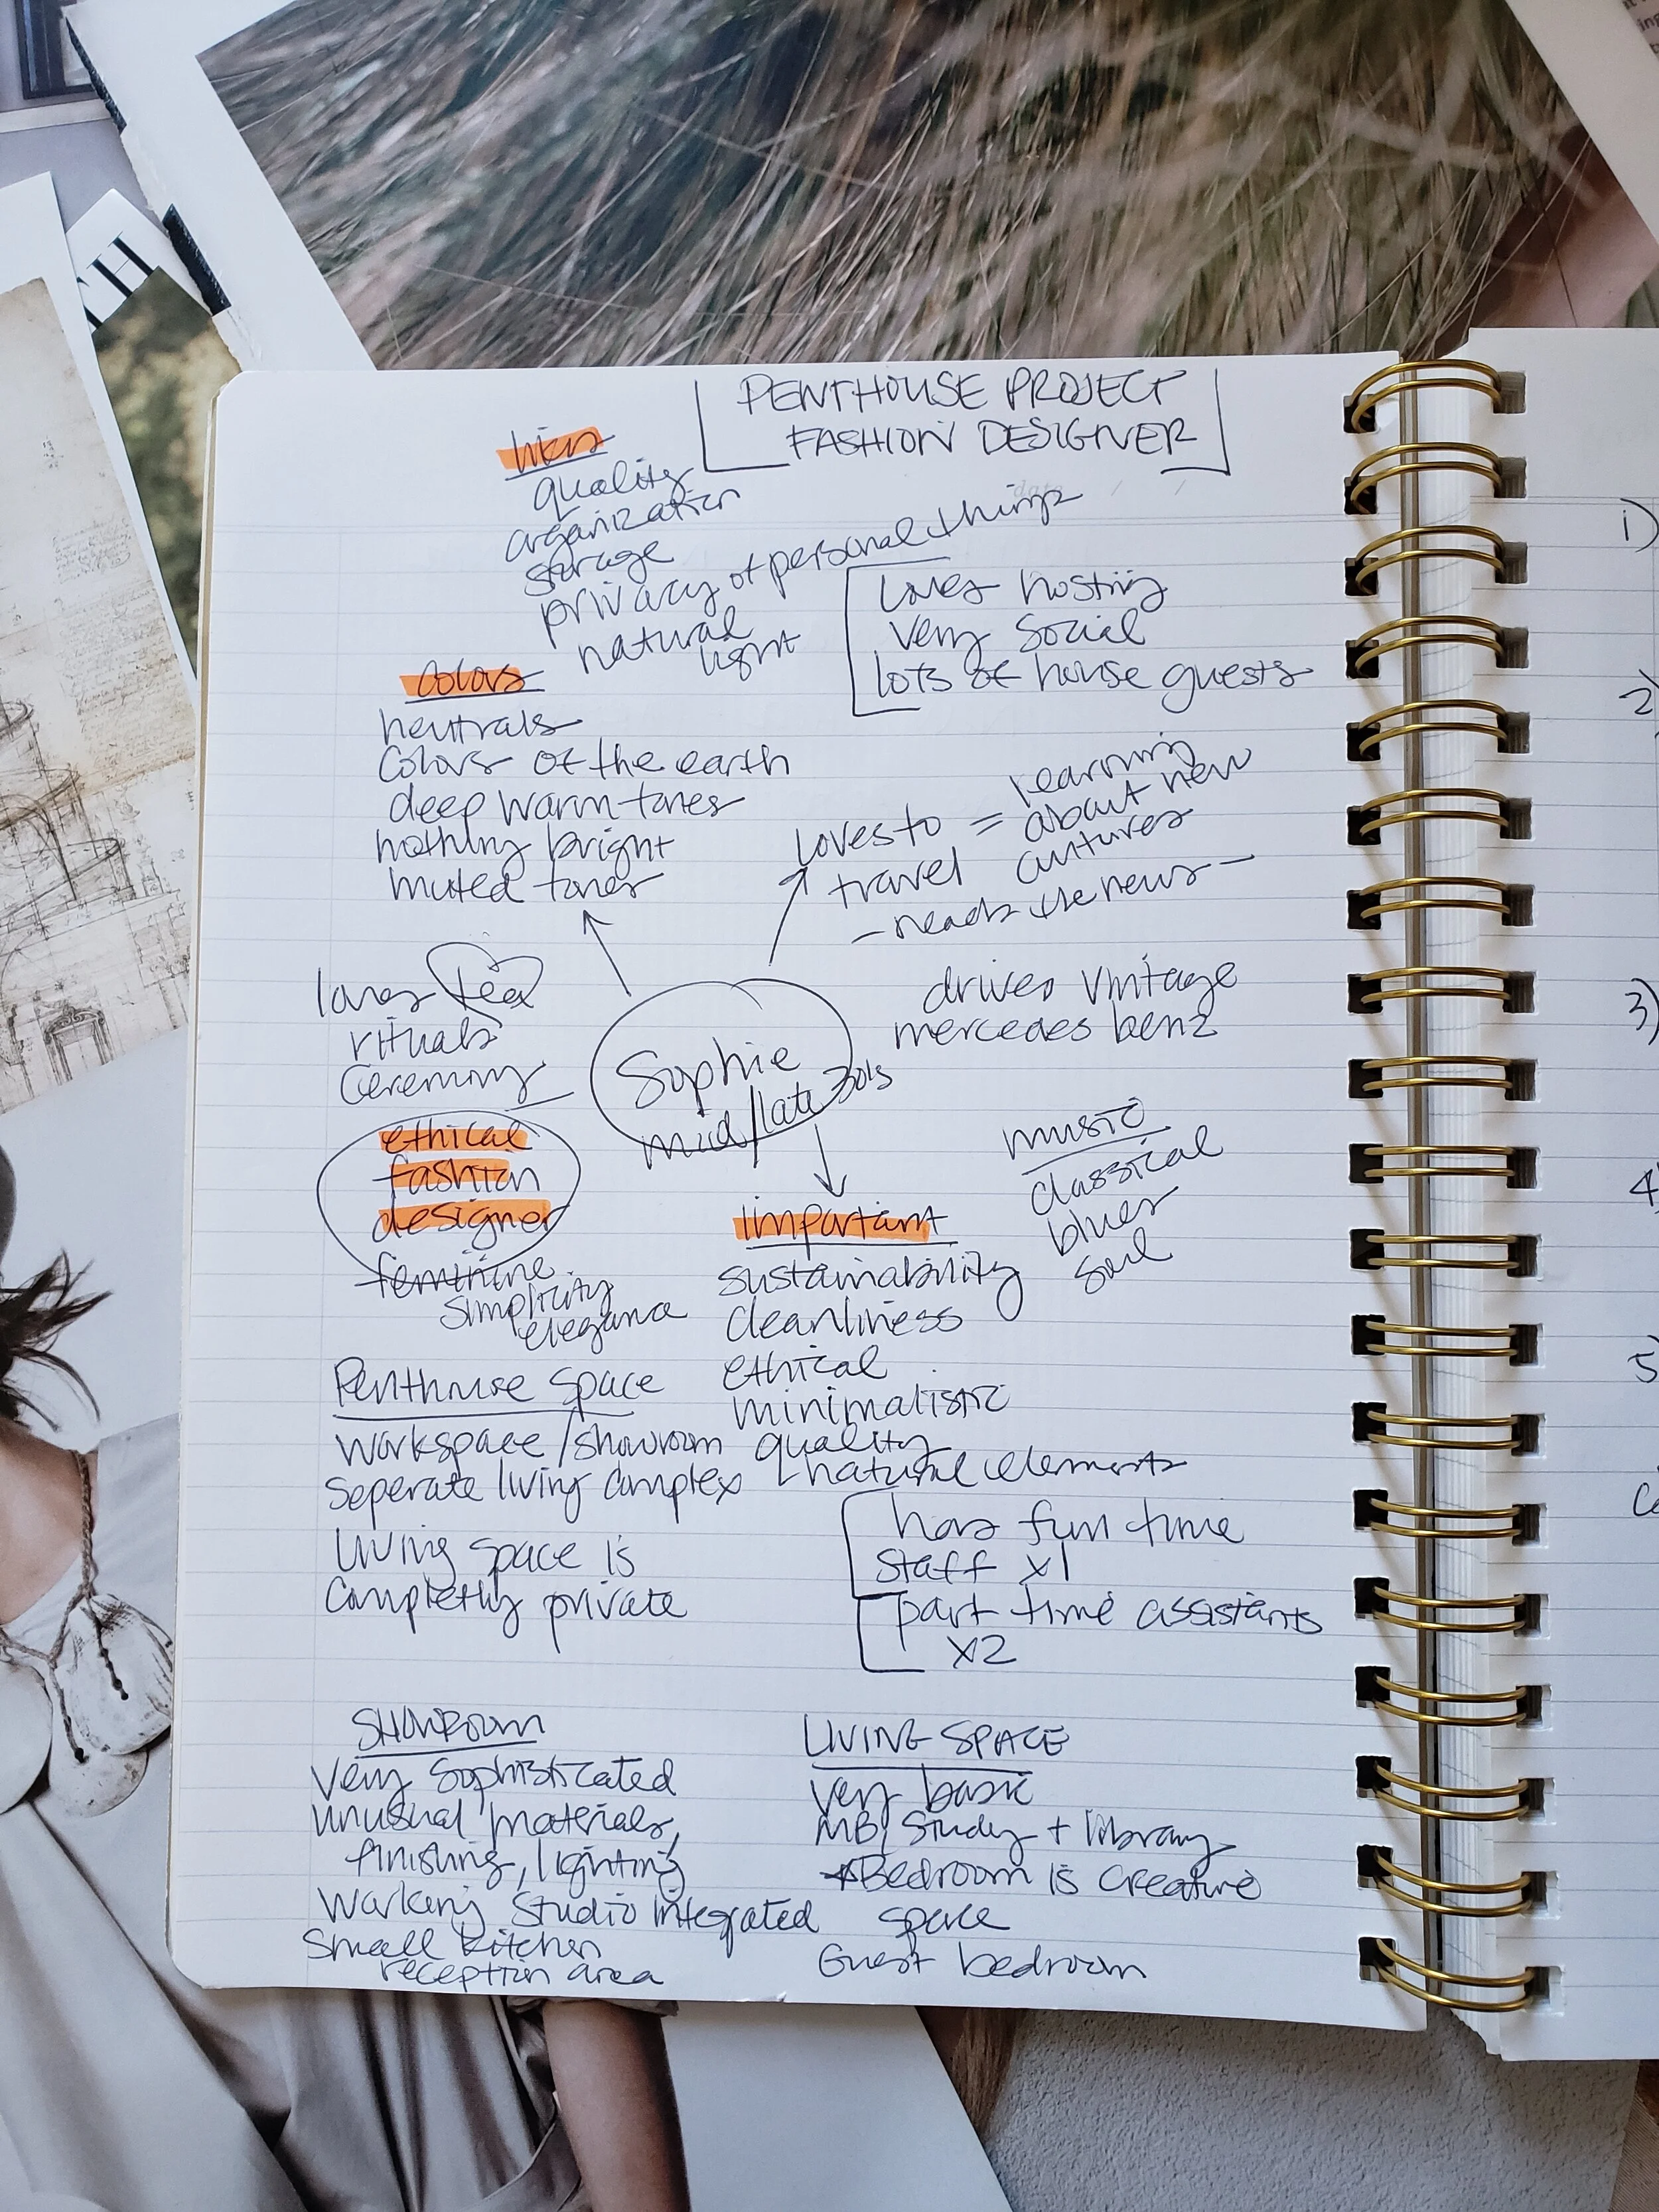

Image Collecting
After jotting down all my notes, I highlighted key elements and words which helped in my research of images that aligned with the clients look and feel. These images are pulled from magazines, but can also be sourced on the web and Pinterest is another way to save inspiration you find.
I have always loved going through countless magazines scanning each page for any image that highlight the key things about the client. I ended up pulling out more than needed, but easily paired them down to the ones that fit the client brief the best.
You can see from the images added to my journal that Sophie prefers neutral muted tones, and natural materials that come from the earth. A balance of femininity and strength comes through with the use of hard stone paired with soft silks.


Design Statement and Concept Board
From there I created my design statement; a short paragraph reflecting the essence of the proposed scheme. This took a few rough drafts before finally getting to the final statement included below which I felt clearly reflected the design concept to be presented to my class (client). The design statement also aids in pulling your final images to be included in the Concept Board.
After finalizing my design statement, I highlighted a few key words and the sourced images that best reflect the design. The images sourced should not necessarily include furniture at this stage or be too literal as to not mis-lead the client or provide wrong direction to what you will actually be sourcing as final materials and furnishings. Actual furniture and finishing pulls will be done in the Moodboard/Design Schematic step of the Design Process! See below for my final Concept Board, it was very well received by my professor and class, and I am looking forward to moving on the next step which is mapping out my bubble diagram and floor plans. Stay tuned…!
